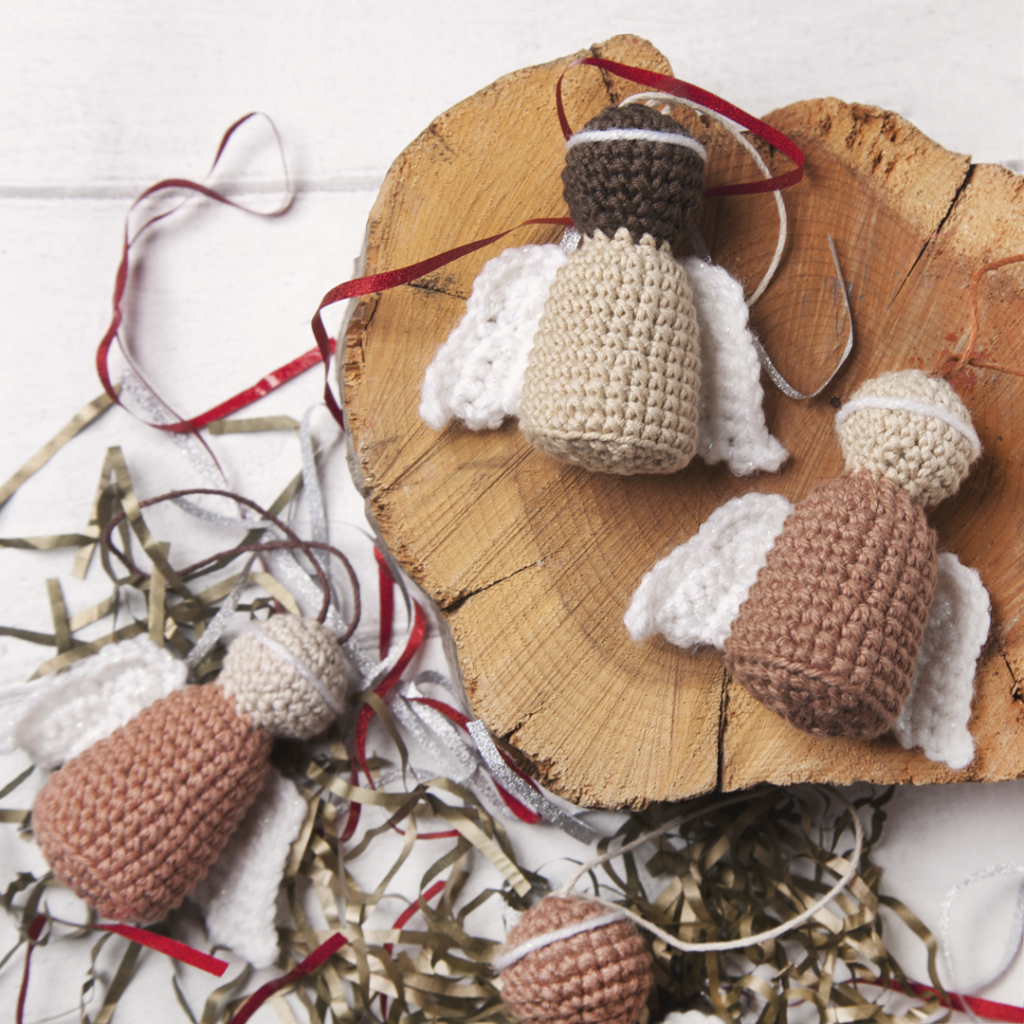
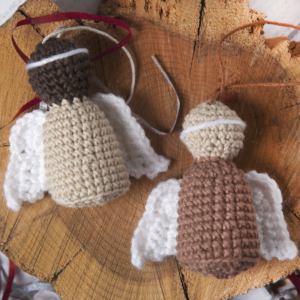
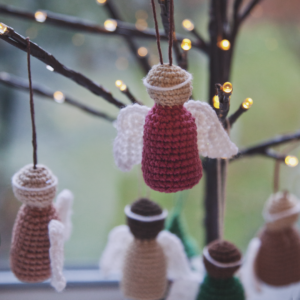
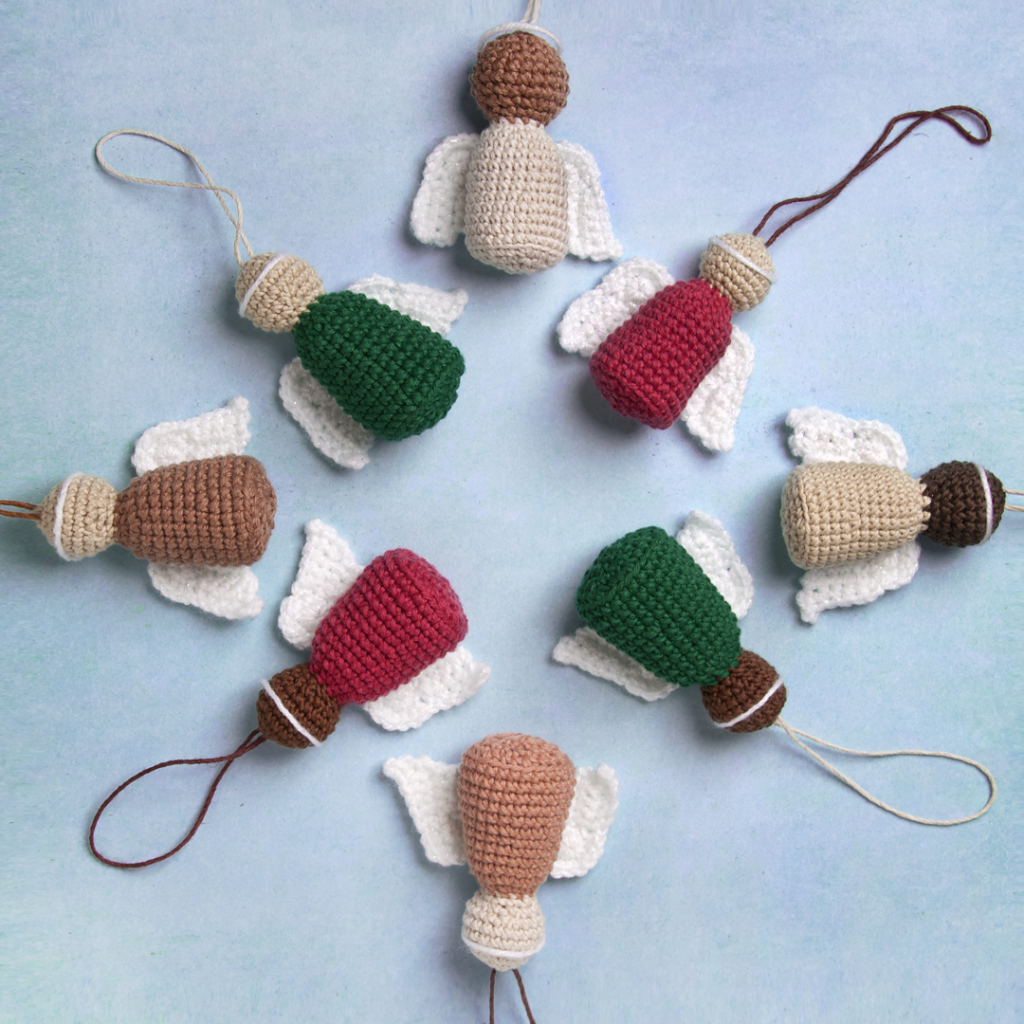
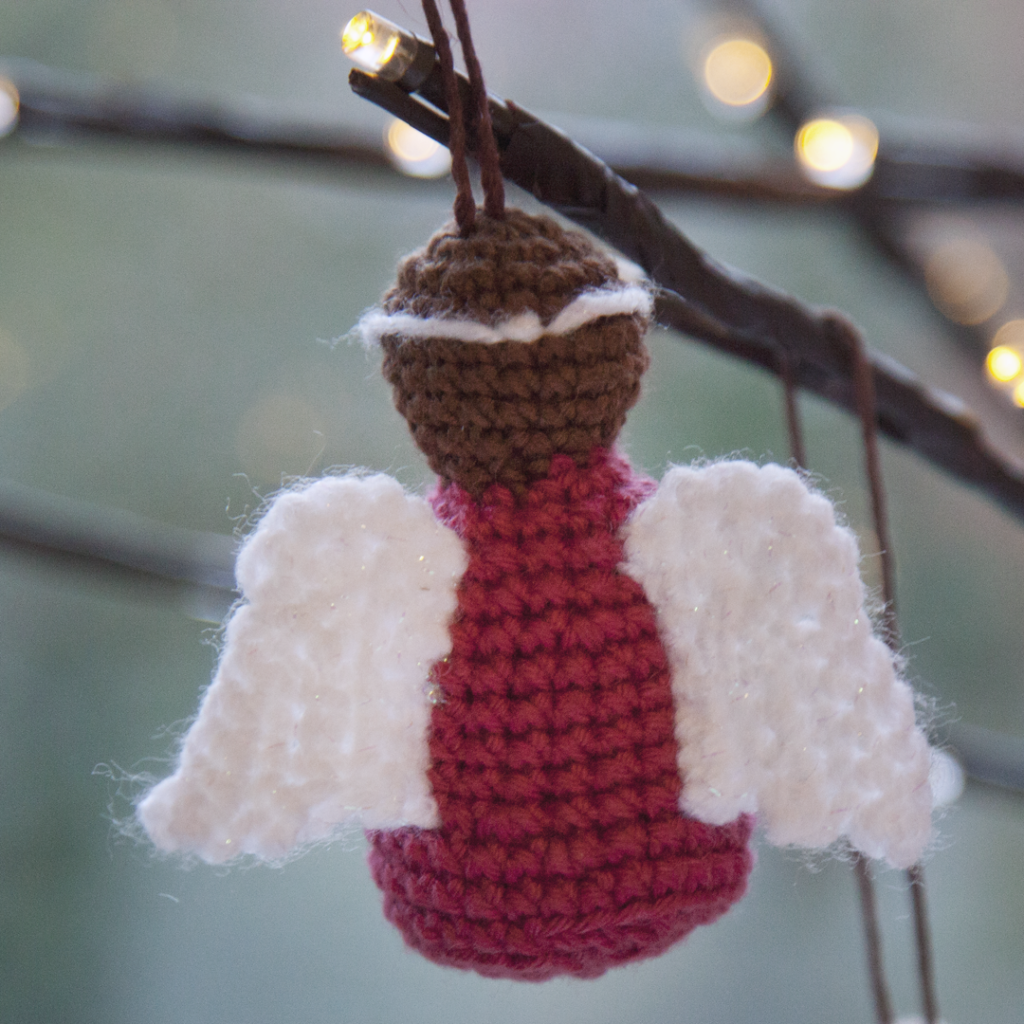
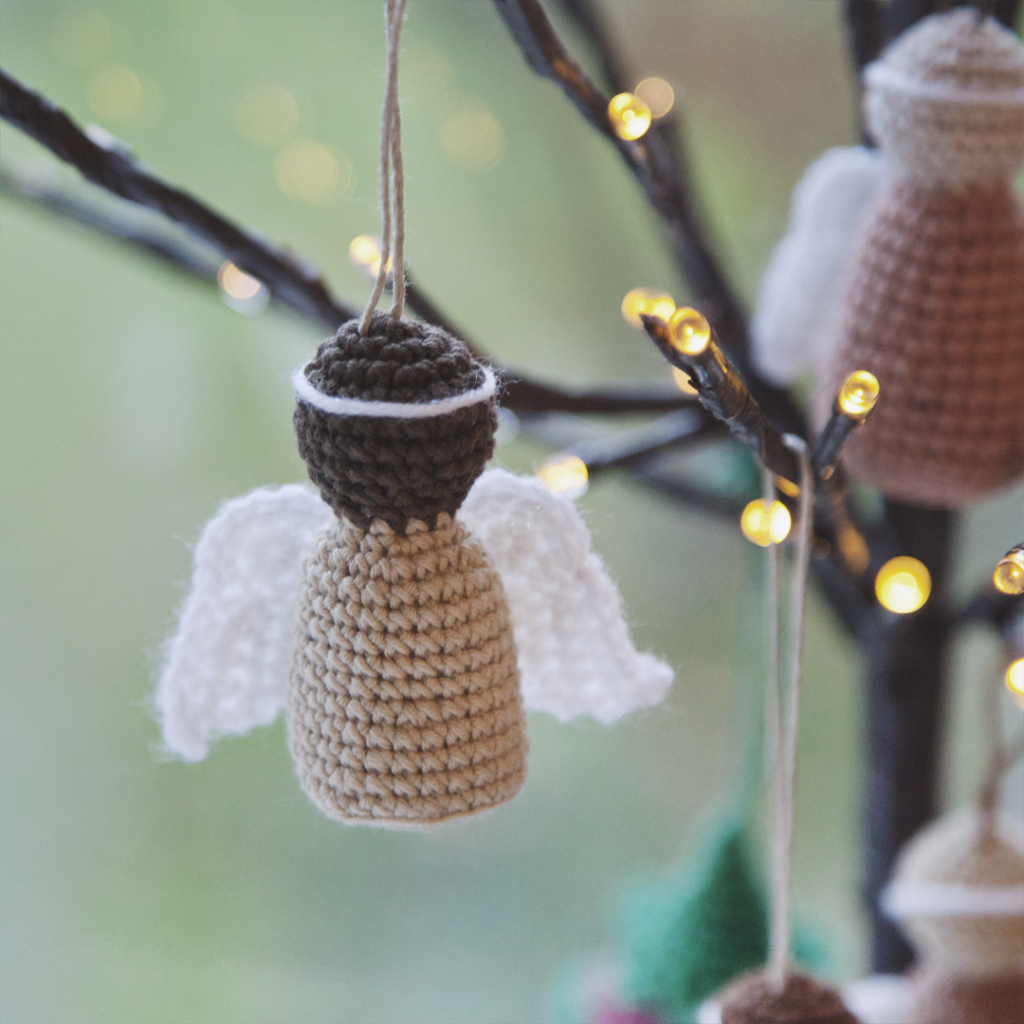
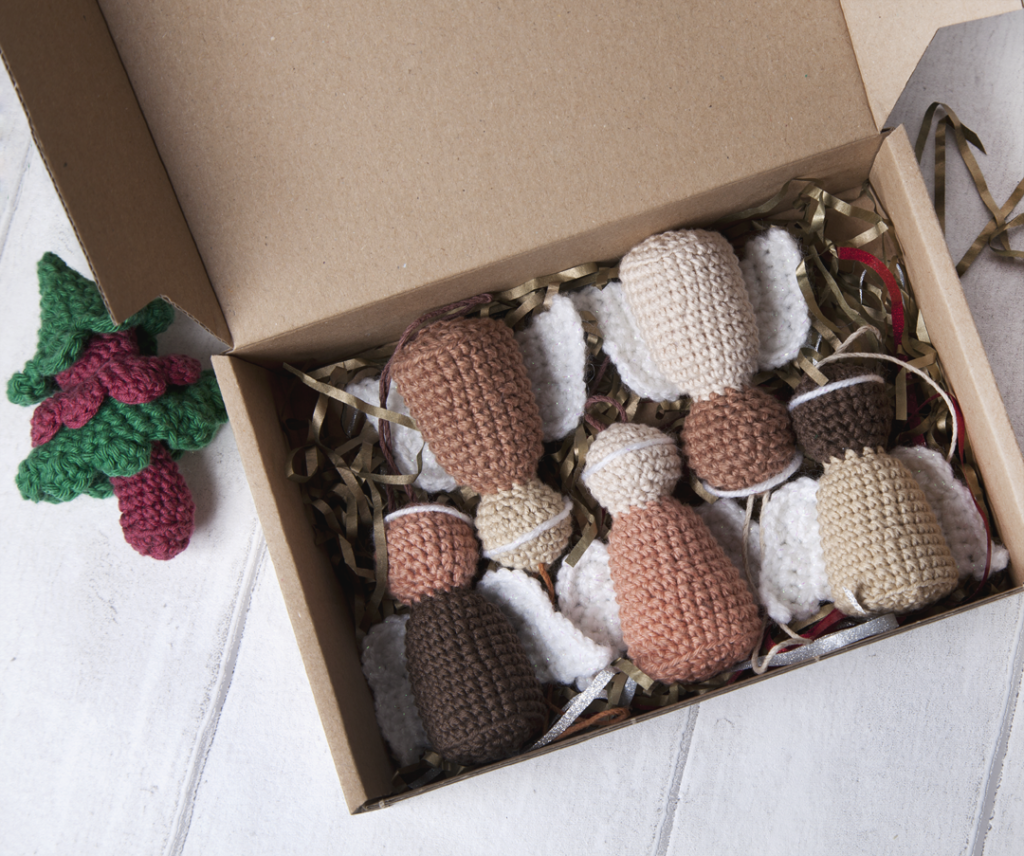
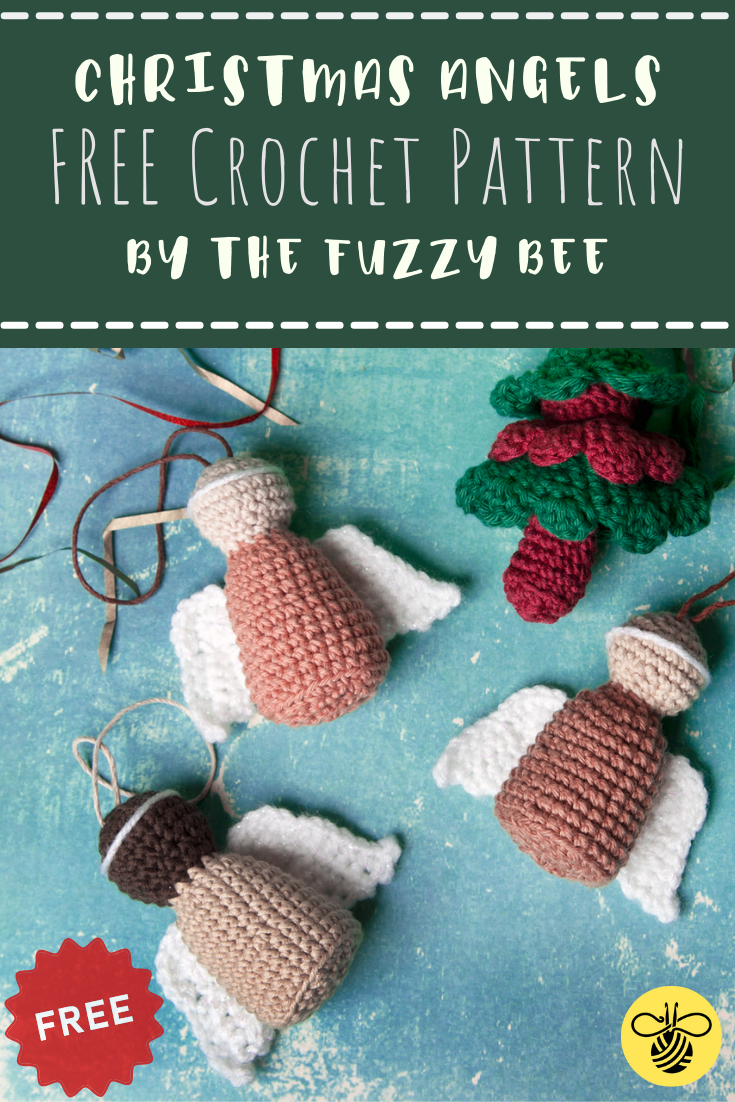
Christmas Tree Angels – Free Pattern!

Below, you’ll find a free crochet pattern to make these lovely little Christmas Angels – they have a little hanging loop so that you can hang them on your Christmas tree, or anywhere you like! You can use whatever colours you like to make your angels…now lets get started!

This pattern is written in UK TERMS. See my handy conversion chart for UK / US terms here.

The size of your angels will vary based on the kind of yarn you use. For the angels pictured, I used RitoHobby Infinity Hearts Rose 8/4 – 100% Cotton yarn and they’re about 6 – 7cm tall. For the wings, I used a DK yarn with a shiny strand running through it (I forget the brand – sorry!) 

Materials

  • Your choice of yarn in:
    – Skin colour
    – Robe colour
    – Wing / Halo colour
  • 2.5 mm hook (or hook size according to yarn label)
  • Toy Stuffing
  • Cord / yarn for the hanging loop (I used hemp cord)
  • Large-eyed needle
  • Pins (to hold wings in place while sewing)
  • Scissors

Abbreviations (UK Terms)

  • ST – Stitch
  • MR- Magic Ring
  • CH – Chain
  • DC – Double crochet (UK)
  • INC – Increase
  • INV DEC – Invisible decrease
  • DEC – Decrease
  • SL ST – Slip stitch
  • FO – Fasten Off

Pattern

Head / Body

The head and body are worked in one piece, in the round, from top to bottom.

Starting in your chosen skin colour:

1: Work 6 dc in a Magic Ring (6)

2: Inc in each stitch (12)

3: [1 dc, inc] x 6 (18)

4: [8 dc, inc] x 2 (20)

5 – 6 (2 rounds): Dc in each stitch (20)

Add your hanging loop now – cut a length of your hanging thread approximately 22cm (I used hemp cord) and feed each end through the top of the head, one each side of the MR.

Securely knot the two ends together on the inside of the head. Add a little stuffing to the head and keep adding stuffing as you go.

7: [8 dc, inv dec] x 2 (18)

8: [1 dc, inv dec] x 6 (12)

9: [3 dc, inv dec] x 2, 2 dc (10)

Change to your robe colour and FO your skin colour.

10: Dc in each stitch (10)

11: [1 dc, inc] x 5 (15)

12: [2 dc, inc] x 5 (20)

13 – 14 (2 rounds): Dc in each stitch (20)

15: Inc, 19 dc (21)

16: 5 dc, inc, 15 dc (22)

17: 10 dc, inc, 11 dc (23)

18: 15 dc, inc, 7 dc (24)

19: 23 dc, inc (25)

20: 5 dc, inc, 19 dc (26)

21: Inc, 13 dc, inc, 11 dc (28)

22: Dc in each stitch (28)

23: In BLO, [2 dc, dec] x 7 (21)

Add stuffing to the body (continue adding as you go).

24: [1 dc, inv dec] x 7 (14)

25: Inv dec x 7 (7)

Fasten off with a long yarn tail. Thread a needle onto your yarn tail and insert the needle into the front loop of each of the remaining 7 stitches. Pull tight to close the ring. Insert the needle into the centre of the closed ring and hide the yarn tail inside the body.

WINGS

Wing 1 (left)

1: 6 dc in Magic Ring (6)

2: Inc in each stitch (12)

3: Chain 6. Starting in the 2nd chain from the hook, dc 5. Slip stitch in the next stitch in the round. Turn your work and work 4 dc back along the stitches you just made. Chain 1 and turn.

Chain 1 and turn. Work 4 dc back towards the circle and then slip stitch in the next stitch of the round. Turn your work and work 3 dc in the stitches you just made, chain 1 and turn, work 3 dc back towards the circle.

Slip stitch in the next stitch of the round and fasten off with a long tail for sewing to the body.

Weave in your starting yarn tail.


Wing 2 (right)

1: 6 dc in Magic Ring (6)

2: Inc in each stitch (12)

3: Ch 4. Starting in the 2nd chain from the hook, dc 3. Slip stitch in the next stitch in the round. Turn your work and work 3 dc back along the stitches you just made. Chain 2, turn and work 4 dc back towards the circle and then slip stitch in the next stitch of the round. Turn your work and work 4 dc in the stitches you just made, chain 2 and turn, then work 5 dc back towards the circle.

Slip stitch in the next stitch of the round and fasten off with a long tail for sewing to the body.

Weave in your starting yarn tail. Sew the wings to the back of the angel, with a gap of approximately 4 – 6 stitches between them (note: your ‘right side’ should be facing the front). It may help to pin them in place before sewing

HALO

Using a strand of your wing yarn, make a hoop around the head, securing the hoop at the back of the head with a couple of stitches. Hide the yarn tails inside the head and body.

Alternatively, you can make a chain (as long as it needs to be) and join with a slip stitch to make a loop. Sew in place on the angel’s head.

THANK YOU for making my pattern…I hope you’ve enjoyed it! I’d love to see your makes. Tag me on my Instagram Page, my Facebook Page or my Twitter Page!

If you would like to say thanks and support the making of more free patterns, I do have a Ko-Fi page!

- Pin It! -